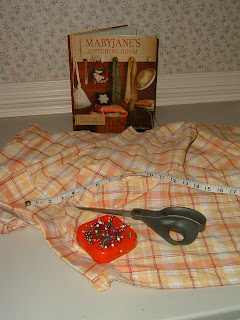
Take your collar and the collar yoke and seperate them. I am going to use the collar yoke for the neck strap. Fold the collar yoke in half, lining up the button to the button hole and then cut it on the center fold. You will use the button and its button hole to attach the bib around your neck!! Cool Huh? I will then take that colar and cut it into a lengthwise rectangle and separate the lining from the outside piece and use those for the loops to attach the neck tie to the bib. It will be a loop affect on the bib and the former (now cut in half collar yoke) will be inserted through the loop and sewn to itself. Now you have made a buttoned back neck tie that you don't have to make a button hole or sew on a button for!!. You can neaten it up by finishing the edges of the yoke strip with 1/4" seam binding.

Next, open up your sleeves. Don't cut off the bottom hem...use that for the hem of your ruffle. Cut straight across both sleeve fabrics at the former armpit line, straighten out your edges, and you now have fabric for your ruffle!! Make sure it is slightly wider than the bottom width of your shirt/apron skirt hem.
 Here is the apron laid out on the floor before any construction to check to see if the parts will work as cut.
Now I promised you a little surprise for the waistline of the apron. A detachable bib...the easy, squeezie way!! In the photo you will see the bottom of the bib lined up with the fabric from the front of the shirt below where I cut off the pocket. It is the buttonhole placket. Cut that placket away from the shirt fabric, leaving yourself a 1/2 inch seam allowance outside of the edge of the placket. If you click on the photo, you will see what I mean. Then turn the placket over and trim this selvedge close to the stitching on the back side of the placket. You will sew this to the inside of the waistband facing...show completed in the next photo. Follow the original shirt stitching lines as your stitching guide, and fold under the cut edges on the ends of the placket. Be sure to line up the center buttonhole with the center of the waistband. Which will also match the center button of the bib!! Then when you want to attach your bib...it will line up and slide into this button hole placket on the inner waistband!! You could also easily sew it on the inside of your waistband as your last step....its just that the stitching will show on the completed waistband on the front if you do this last, but if you don't mind that, it is easier to do it that way! You could always cover the stitching with rick rack or a pretty wide ribbon trim or just let it go and show!

The next photo shows the completed apron....so how did I go from here to there? I just sewed it together using any standard apron sewing instructions. After you obtain the fabric from the shirt, the rest is just standard apron construction!!! With of course a few minor adjustments like the detachable bib using the button plackets!!!
Oh, for the ruffle, you can leave the ruffle off and just decorate the hem with rick rack. I just wanted to see if I could piece a decent looking ruffle. I was amazed how much fabric I could get out of that one short sleeved shirt. With some creative lay out, you can probably use a purchased pattern to lay out your apron. Finish your raw edges with bias tape. If you don't have enough fabric to do a neck tie, you can always use a coordinating bias tape for the ties. Just sew them closed close to the open edge and attach like any other neck tie. On the completed apron below....I have not used the collar placket for the neck tie. I am waiting to customize it for the winner of this apron. I have a temporary seam binding neck tie for the photo.
And Voila' you have a beautiful functional apron for just $2.85!!
 Oh here is the view of the half apron....the same apron, two looks!! I hope you enjoyed this tutorial....please email me if you have any questions on this.
This is more than I usually like to spend on a thrift store shirt, but the colors were so beautiful! I could do this apron for alot less, depending on the price of the shirt and if I made my own bias tape with a coordinating shirt or thrifted fabric!! You could make this apron for less than $1 if you hit the thrift store on Wacky Wednesday!!
LOL...thanks for blogging with me today...phew....I'm tired!
Later, my friends! I hope you will try this simple shirt conversion and email me your photos, so I can post them on my blog giving you credit for your repurposed apron!!
Oh, one last thought. I made this on that 1936 white rotary that the dress form is standing near. It only has a straight stitch....so anyone can do this apron or one that is similar!!
Georgann


