Here goes:
Choose a man's shirt. Remember, the larger the shirt, the more fabric you will have. I try to retain as many finished details in the final apron as possible. (such as hems and finished edges, pockets, buttoned plackets.) A long sleeve shirt will give you really nice long ties.
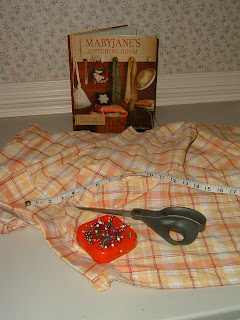
For this project, I chose a 100% cotton with a beautiful woven pattern...not printed. It also has a stain resistant finish....extra benefit for an apron. It is a Large/short sleeve. Would have preferred the long sleeve, but couldn't resist the color and plaid pattern of this shirt.
Then gather your supplies and inspiration! The only thing missing in this photo is the bias tape. I bought a package later in the day for $1.85 at Hancock fabrics. One package was enough to go around the bib and sides and will make a neck strap if that is what you choose to use.
More in the next entry.


2 comments:
So delighted to have finally found an apron made from men's shirts! I have been searching for months after running across a stash of my hubby's old retired shirts, and as a mama of a 7, 5, 11 mo. and one more due in November, I desperately need some good, sturdy, affordable aprons!! Thank you, thank you!
I'm crossing my fingers on winning the clever creation!
From one farm girl wannabe to another . . .
wow you are one talented person!
i have seen people do re-purposing, but it always looks it. your items look like they were made by a seamstress from fabric.
i too have the new butters book. and i just love it!
Post a Comment